So, I have an issue and here are the steps that got me there:
I started by creating a 32x16 map
I then proceed to import a 32x32 tile which all align together nicely
I then proceed to import a 32x32 tile which has some grass which hangs off the edge. Effectively making the total canvas size of that image when cropped. 38x38
I proceed to import this into my map and whilst all the 38x38’s align nicely when sat together, of course they do not connect properly to the 32x32’s.
I would normally think I am a relatively fast learner but for some reason my mind just cannot comprehend how to import tiles of varying sizes into a map that is pre-determined at a size of 32x16. I read elsewhere on another post that maps cannot have varying sizes of tiles. How then, can I utilise within my map a tile that is supposed to just be a variant on my basic grass tile but is otherwise a few pixels larger due to some overhanging grass?
Thank you for reading and I hope I have made it relatively clear what I am struggling with!
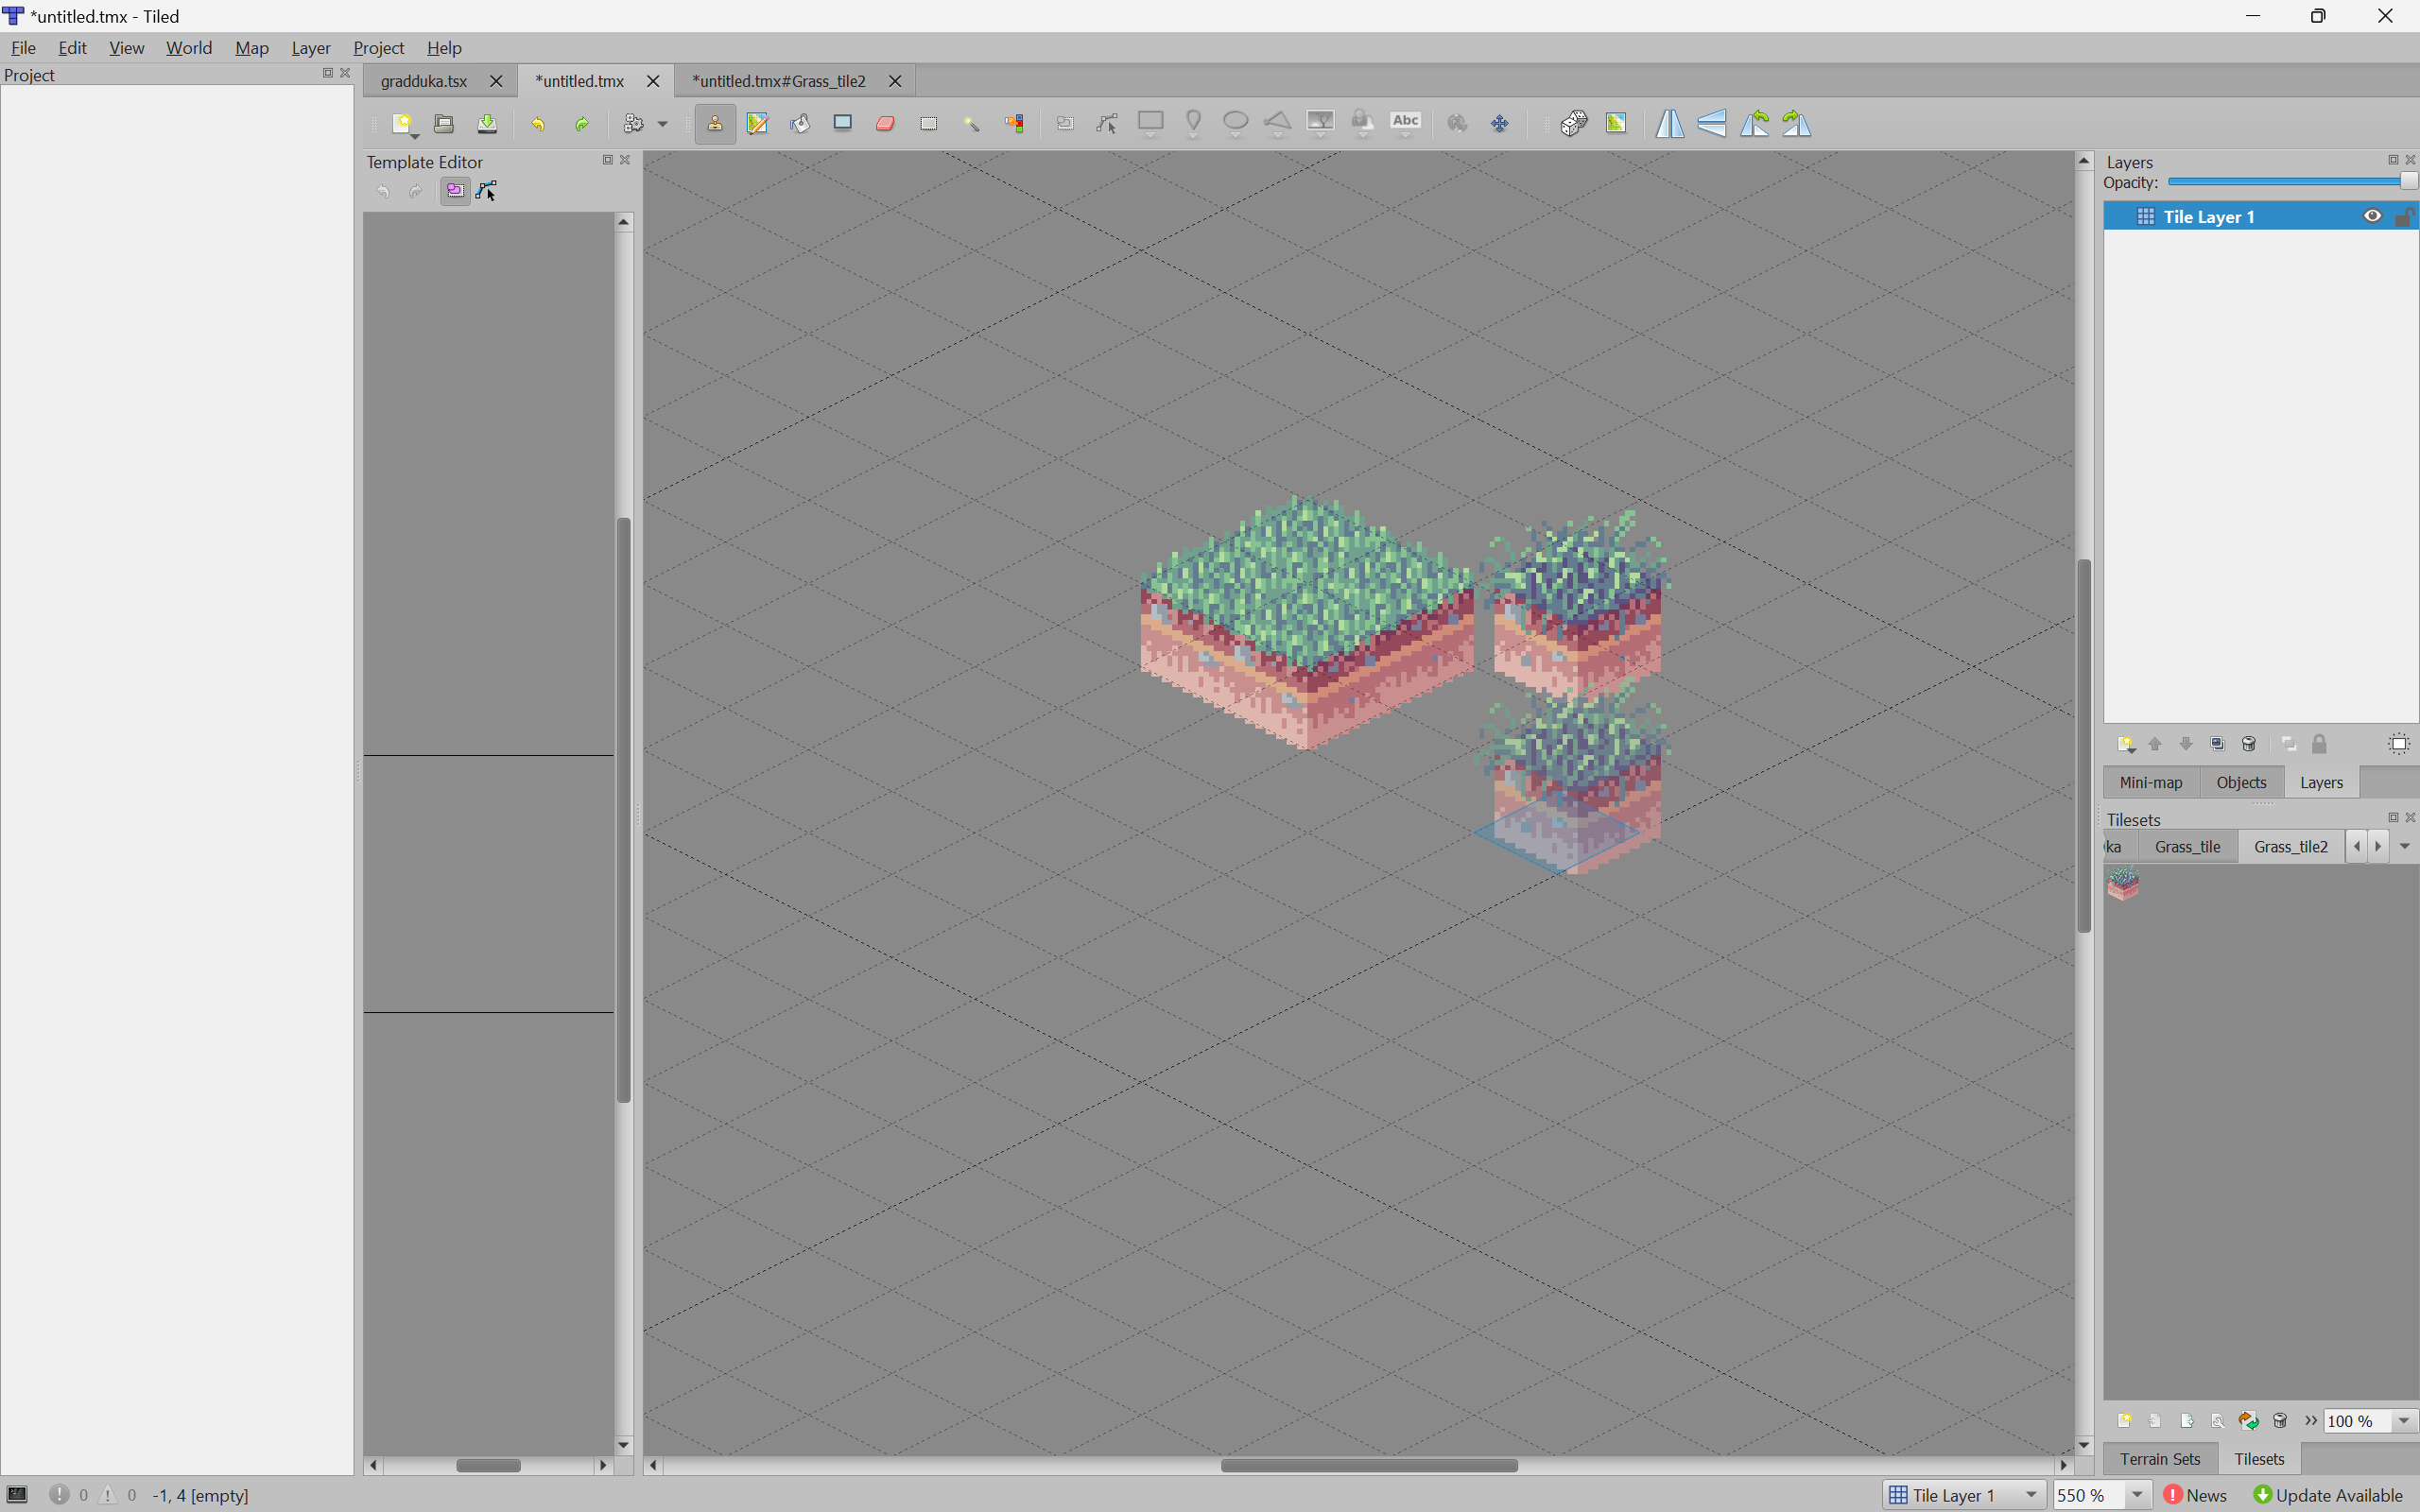
As you can see from the screenshot below, the tile with the longer grass, does not connect properly to the ones with the short grass. The blue Isometric tile that sits beneath the new tile is also off. Cant think how to rectify this. Help me good people!
UPDATE: I feel that the Gods of the Isometric realms have heard my cries of sorrow and having played around in the tileset properties, I happened across a plucky little setting called “Drawing Offset” - having set the ‘x’ property to - 4, it seems to have fixed this issue. I assume that is what I should have done. Hopefully it is not just a mere illusion of a fix to a greater issue.
You can change the Drawing Offset in the Tileset Properties to shift all tiles in a tileset by some pixels, in order to align the tiles property to the grid.
What is currently not possible is to set the Drawing Offset per tile, so you can’t currently mix tiles needing different offsets in the same tileset. This is being worked on for a future release.
That’s great to know and I’m glad that the whole offset property was indeed the correct solution. It’s also good to know about the current limitations on that particular front as well because I thought I was doing it all wrong yesterday when so many of my tiles needed some kind of offset. This caused me to make a new tile set every time one of my tiles needed this particular adjustment. It will just give me something to think about when I go back into CSP and design my next tiles.
Even after per-tile offsets are added, setting up your tiles so that they all have the same offset would be beneficial to anyone else who’d use your tiles, by avoiding the hassle of manually figuring out and setting the appropriate offsets.
Your totally right, it just makes sense to keep this in mind when designing the tiles for ease of use across the board. I will keep the overlap of the tile features at a minimum unless I intend for it to be a prop etc. This is all good to know and having this feedback only helps broaden my understanding of the things I need to take into consideration when designing my tiles, so I thank you both!
There’s no problem with letting tiles overlap as much as you like, as long as all the tiles are positioned within a consistent bounding box and need the same offset to work correctly. If even one tile needs to go outside its bounds, all the tiles should be extended.
Thank you for clearing that up for me. I’m sorry for yet more questions that are probably quite straight forward, but in terms of ensuring that the tiles are “positioned within a consistent bounding box” - is this something that needs to be done within the original painting programme?
Example:
I have a 32x32 tile, but because of a blade of grass that overlapped the edge, it effectively becomes a 34x32 tile. Does this mean that at the moment of export from the original painting programme I have to ensure all the other 32x32 tiles have an additional 2 pixel “border” so that they have the same dimensions as the 34x32?
I am probably completely overcomplicating this, I understand.
Again thank you for any and all help!
Oh thought I would add, I will go try exactly what I said, I am not expecting you just to feed me the answers, best thing I can do is put it to the test myself!
I feel I may have had a bit of an epiphany on what I need to do. I tried what I thought you meant above and that wasn’t the answer, however I feel I have just realised the error of my ways. I am going to go back into the editor and put it to the test.
If you want to be able to use the same draw offset for every tile, yes, that is exactly it.
As you can imagine, this leads to a lot of wasted space, which is why per-tile offsets are being worked on xP Until that’s ready (…and supported by game engines), an option some people go with is to have multiple tilesets, so that they can have all their tiles with 0,0 draw offset in one tileset, all their tiles that need a -2px horizontal offset in another tileset, and so on. This still benefits from some padding to avoid needing a separate tileset for every possible tile size, but it can reduce the amount of empty space. The drawback to having a bunch of tilesets is that Terrains only work within a single tileset.
Yet another option, if only a few tiles need this sort of overlap stuff, is to put the overlaps into their own standard-size tiles, and add them using Terrains or Automapping. This is a very common approach for orthographic tiles, but is less common for isometric tiles because isometric level designers usually prefer to keep each tile independent of other tiles. I only mention it here for completeness, this is usually not a good option for iso tiles.